PAX A920 Setup
Integrate the PAX A920 Android smart terminal with the Cloud9 gateway.
1. Register the A920 in the PAX Store
a. Login to PAX Store
Go to the PAX US Marketplace at https://paxus.paxstore.us/. If you don't have login credentials, contact PAX support.
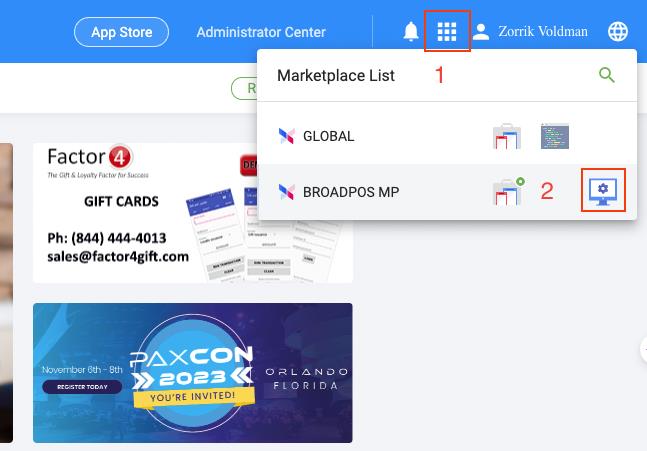
b. Navigate to Terminal Manager
Go to Administrator Center → Terminal Manager → click +Terminal.
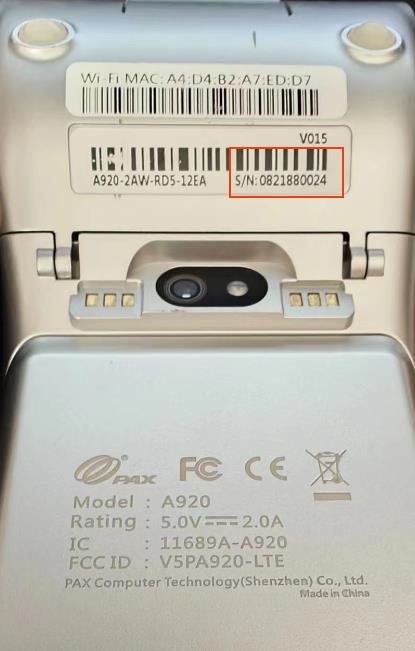
c. Register the A920 Device
- Power on the A920 and get the serial number from the label on the back
- Fill in your real device and merchant info to complete registration
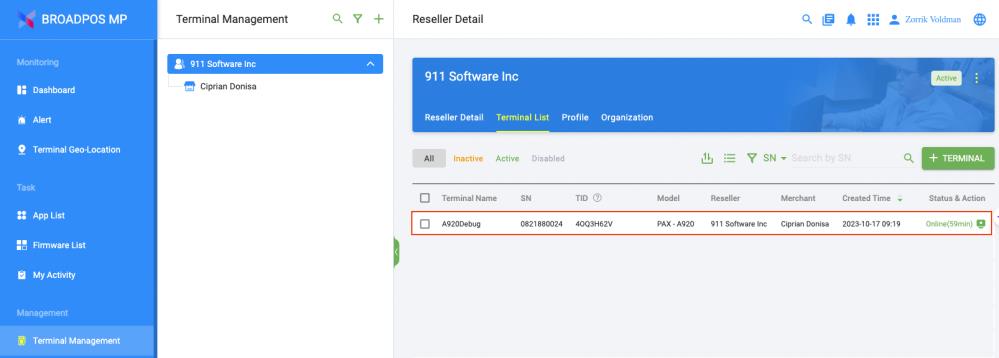
- After registration, your device appears in the terminal list — click the device item
d. Push the BroadPOS Payment App
- Select your payment processor (e.g. Elavon, TSYS, Portico)
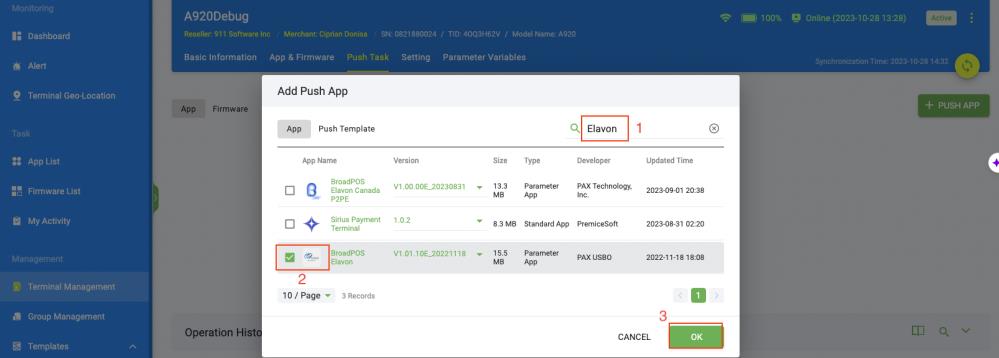
- Go to Push Task → click PUSH APP
- Search for the processor app (e.g. "Elavon") and select the BroadPOS version
- Confirm the industry type is correct on the push task configuration page
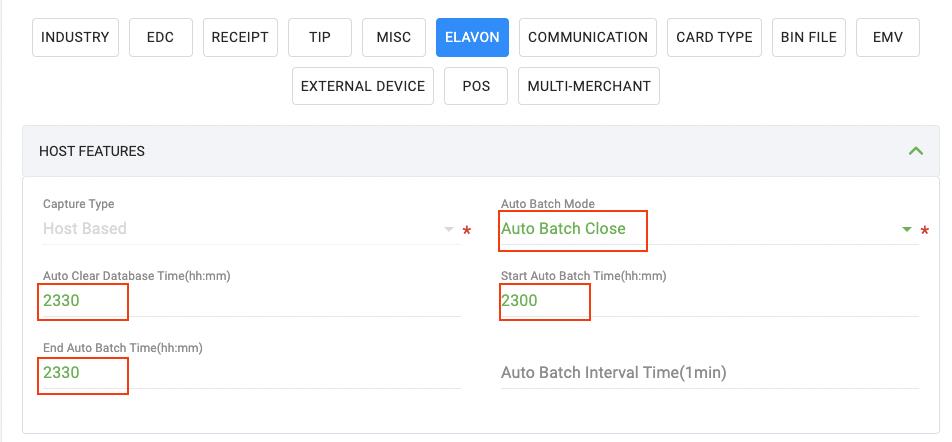
- Set ECR-Terminal integration mod to
External POSin the MISC tab - Set processor params in the processor tab (provided by your payment processor)
- Activate the push task
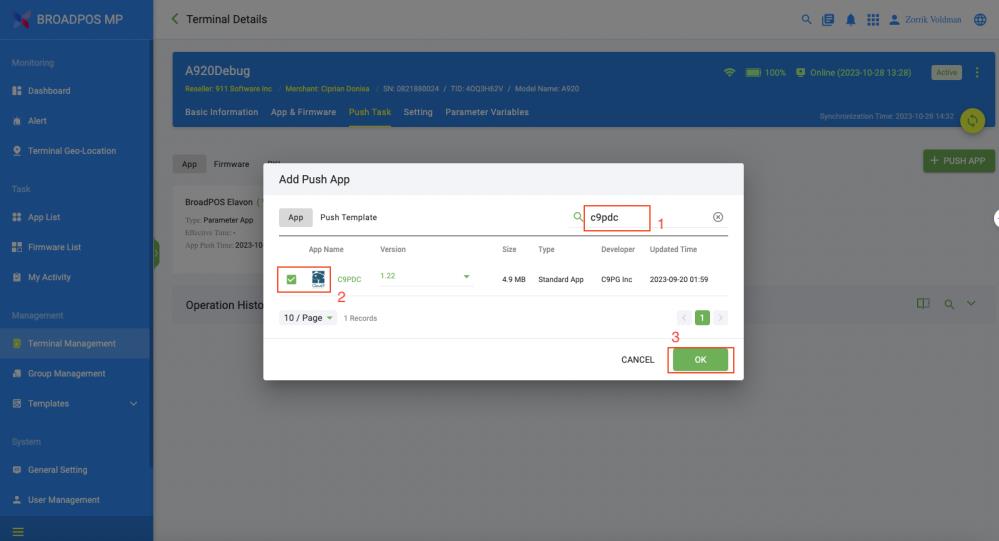
e. Push the C9PDC App
After pushing the BroadPOS app, push the C9PDC app. No params need to be configured in the push task configuration at this stage.
f. Run the C9PDC App
The C9PDC app serves as a bridge to the Cloud9 gateway — keep it running at all times. Default endpoints:
HTTPS:     https://link.c9pg.com:11971/txnApi
WebSocket: wss://link.c9pg.com:14971
REST API:  https://link.c9pg.com:11971/restApi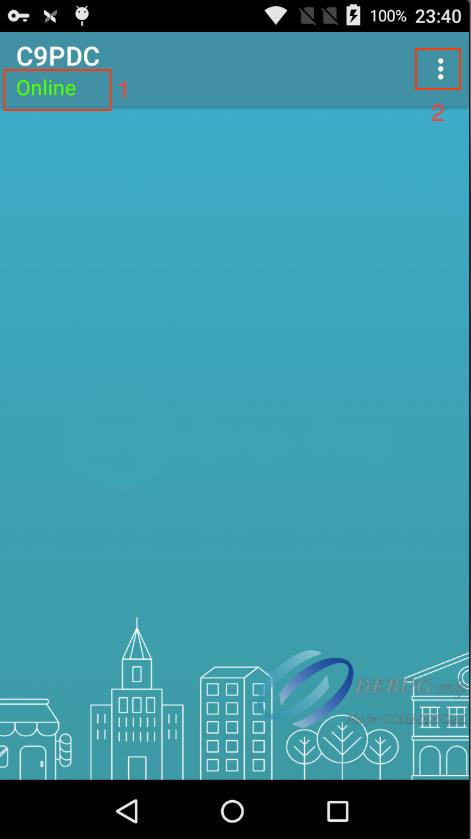
2. Create Cloud9 Account & Bind Device
a. Login to Cloud9 Portal
Go to https://portal.c9pg.com/. Contact Cloud9 support if you don't have credentials.
b. Add a New Merchant Account
Set the Processor to PaxSemi. Only the Auto Batch Time param takes effect — use the same value as the end auto batch time in the payment app.
c. Register Device in Cloud9
- Add a new Terminal and click Register Terminal
- Choose
Paxas terminal type and fill in your real device serial number - Click Proceed to complete registration
All configuration tasks are now complete.
3. Construct Transactions
For full transaction API documentation, visit the API Guide or the API sandbox.