Portal Setup Guide
Create your business structure, configure merchant accounts, and connect payment terminals through the Cloud9 portal.
1. Create Business Structure
The platform organizes your corporate hierarchy through these concepts:
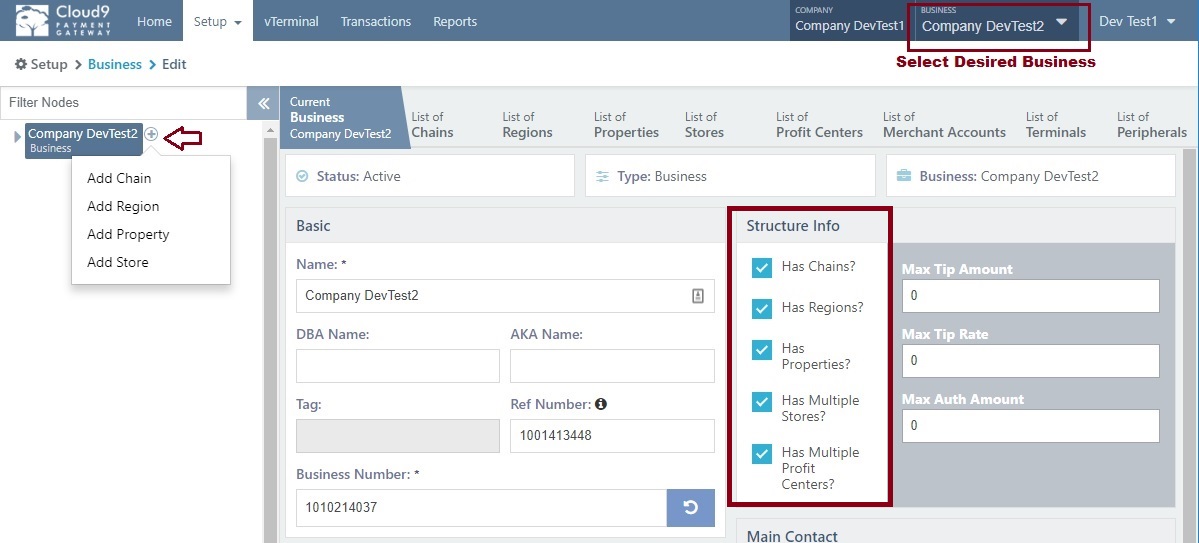
For dealers managing multiple businesses, you can create separate Business entities under your main account. Otherwise, maintain one business for your own operations.
If your business has multiple concepts or requires non-region-based subdivisions due to scale, this feature helps organize structure. Enable via the Has Chains setting.
Subdivides large businesses into geographic areas. Enable through the Has Regions setting in business setup.
Groups entities like hotels and golf clubs. Contains various stores including restaurants and retail operations. Enable via the Has Properties setting.
Represents a physical location where commerce occurs. Enable Has Multiple Stores if you need multiple stores per enclosing concept.
Characterized by industry type (Retail, eCommerce), attendance, and card activity. Functions as a gateway wrapper for merchant accounts in a one-to-one relationship. A store may contain multiple Profit Centers (example: a restaurant with online sales, cashier, and bar operations). Enable via the Has Multiple Profit Centers setting.
The actual merchant account from Cloud9 Merchant Services or external providers.
Virtual terminal attachable to any Merchant Account for payment processing.
2. Create New Merchant
After establishing your business structure and Store, create a new merchant account. The hierarchical structure flows:
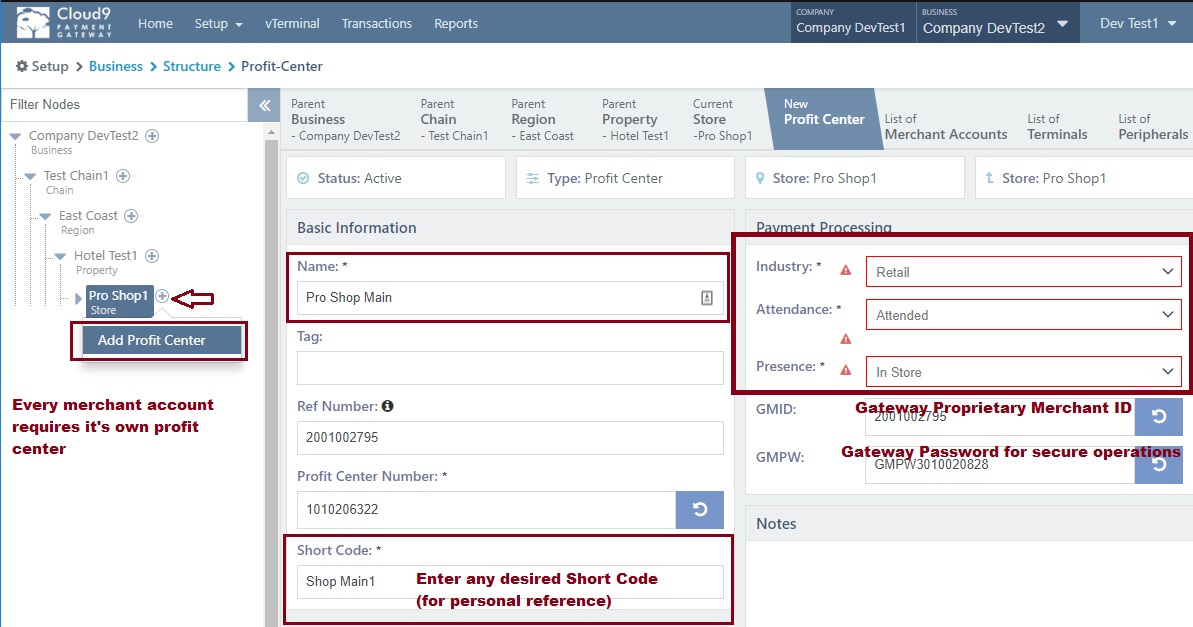
Step 1: Create a Profit Center
Navigate to your Store and create a new Profit Center. Configure the industry type, attendance mode, and card activity settings appropriate for this location.
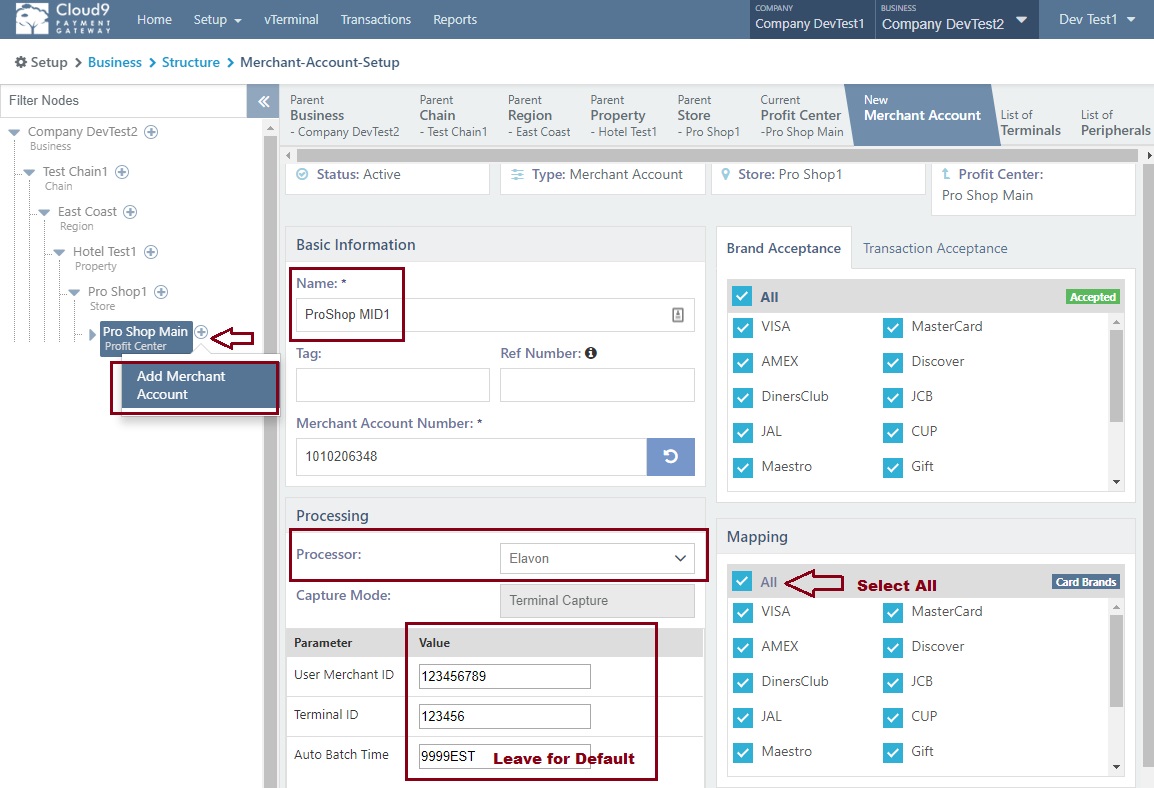
Step 2: Create the Merchant Account
Within the Profit Center, create the Merchant Account using your credentials from Cloud9 Merchant Services or your external processor.
3. Payment Device Controller
Configure the optional Cloud9 Payment Device Controller to connect physical payment terminals to your merchant accounts. See the Payment Device Controller page for architecture options and setup details.
4. Store & Forward (Rush Mode)
Enable offline transaction processing with Store & Forward mode. When connectivity drops, transactions are queued locally and settled automatically when the connection returns. Cloud9 supports both client-side and server-side store-and-forward for maximum resilience.
Refer to the Offline Store & Forward documentation for configuration details.